Text Speed Preview
Preview of Text CPS in Preferences
Text Speed is one of the settings that you can always find in visual novels. Text Speed, more correctly Text CPS, is the speed at which text written inside labels appears on screen.
While this setting is always included, there's not often a preview of the speed, which can be annoying in practice. Here's how I usually set text speed in games I play:
- See what the current text speed is
- Go to Preferences and change it
- Go back to find out I set it to be too slow
- Go back to Preferences and change it
- Go back to continue with the gam-- oh come on, it's too fast now.
- Go to Preferences for the third time and change it again
- Whew, finally got it right.
So that's what we're coding today - a custom Displayable that can be added into the Preferences screen to show what the current text cps setting looks like!
This will be the first custom Displayable that we've seen on the website.
Called CDDs, or Creator Defined Displayables, these are one of the most complex tools Ren'Py has in it's arsenal. I love them with every fiber of my being - in the right hands, nothing in Ren'py is as powerful.
Displayables are objects that can be used as images. Ren'Py has a lot of default Displayables, like Solid, Frame or Movie. With complicated enough code, we can define our own.
Before we begin, I have to mention that this code was basically a collaboration!
Originally by methanoliver:
https://gist.github.com/methanoliver/bbb026b2c6daeb9b7aae508314e30cfd

Enhanced by Lezalith:
https://gist.github.com/Lezalith/f6ea469f10f10d21f53c2c5f592cd12f

Adapted specifically for Preferences screen by Shawna:
https://gist.github.com/shawna-p/3a12772369af03b85b25196275412868
I will first show the entire code of the CDD that we've created, and then I'll break down the individual methods.
init -10 python:
class PreviewSlowText(renpy.Displayable):
"""
A class to display a preview of the current CPS settings.
Attributes:
-----------
text : string
The text to display for this displayable preview.
properties : dict
Optional keyword arguments that will be applied to the text
to style it.
"""
def __init__(self, text, **properties):
super(PreviewSlowText, self).__init__()
# Store original arguments for recreating the Text child later
self.original_text = text
self.original_properties = properties
# Text displayable that represents PreviewSlowText.
self.current_child = self.new_text()
# The "start time" of the animation
self.start_st = None
# The current st of the animation
self.current_st = 0
def new_text(self):
"""Create a new Text object with the current CPS."""
return Text(self.original_text, slow_cps = preferences.text_cps,
**self.original_properties)
def update_cps(self):
"""Update the displayable to show the text at the new CPS."""
self.current_child = self.new_text()
self.start_st = self.current_st
def render(self, width, height, st, at):
"""Render the text to the screen."""
# Record when this animation is starting
if self.start_st is None:
self.start_st = st
# Keep track of the current st
self.current_st = st
# Trigger this function again when possible,
# to test and/or update all of this stuff again.
renpy.redraw(self, 0)
# Create a render (canvas).
render = renpy.Render(width, height)
# Calculate the "virtual" start time
new_st = st - self.start_st
# Place the Text child onto it, with the adjusted st
render.place(self.current_child, st = new_st, at = at)
# Return the render.
return renderLet's get down to breaking it all down!
Aside from the methods, there's one very important fact - our CDD is subclassed from renpy.Displayable. This is done by putting it into parentheses behind the class's name.
def __init__(self, text, **properties):
super(PreviewSlowText, self).__init__()
# Store original arguments for recreating the Text child later
self.original_text = text
self.original_properties = properties
# Text displayable that represents PreviewSlowText.
self.current_child = self.new_text()
# The "start time" of the animation
self.start_st = None
# The current st of the animation
self.current_st = 0First, the almighty __init__. This is a function called when the object is defined.
What does it all do?
First, it calls the super function, to inherit everything it needs to become a Displayable from it's superclass, renpy.Displayable.
I should've mentioned that this object takes two arguments:
- text, a string that is the text of this Displayable
- properties, a dictionary with text and transform properties for styling this Displayable
Finally, two more variables are defined:
- start_st, which allows us to restart the text preview when needed
- current_st, which is nothing more than the render method's st argument stored in a variable
def new_text(self):
"""Create a new Text object with the current CPS."""
return Text(self.original_text, slow_cps = preferences.text_cps,
**self.original_properties)new_text method is used to create a new Text Displayable representing this preview. It is created from the stored original_text and original_properties, with the current cps gotten from preferences.text_cps.
def update_cps(self):
"""Update the displayable to show the text at the new CPS."""
self.current_child = self.new_text()
self.start_st = self.current_stupdate_cps is a method called when the cps gets updated.
It is called by the Text Speed bar, which is given the release property to call this method.
def render(self, width, height, st, at):
"""Render the text to the screen."""
# Record when this animation is starting
if self.start_st is None:
self.start_st = st
# Keep track of the current st
self.current_st = st
# Trigger this function again when possible,
# to test and/or update all of this stuff again.
renpy.redraw(self, 0)
# Create a render (canvas).
render = renpy.Render(width, height)
# Calculate the "virtual" start time
new_st = st - self.start_st
# Place the Text child onto it, with the adjusted st
render.place(self.current_child, st = new_st, at = at)
# Return the render.
return renderFinally, the render method is what's making Displayable a Displayable. Inside, a renpy.Render object is always created, has .placed Displayables into it that should be shown on screen, and returned.
It is continuously called with the help of renpy.redraw, to make sure this code keeps on running and places the updated Displayable if update_cps was called.
The method first records the st if this is the first time the Displayable is shown. This is done only once, and afterwards st continues to be recorded only in the current_st variable.
These two variables are used towards the end of the render method, to calculate time of the last update_cps call, so that the reveal of the text can repeat.
Finally, as already mentioned, the current Text Displayable stored in current_child variable is placed into the Render object and it is returned - a very Displayable thing to do.
And that's all of the CDD code. With it defined, all that remains is implementing it in the Preferences screen.
And to show how that is done, I thought I could use a project of a fellow Ren'Py creator! Alaric was kind enough to offer their game, Catalyst: Blind Faith, so I shall use it to show you how easy it is to implement this in your own project.
You can check out Catalyst: Blind Faith on itch.io, or straight up join the game's Discord Server. Catalyst is a dark fantasy and horror game about conquering your demons, inside and out. You control a disturbed young priest as he travels through ancient ruins with nothing but his dog and his faith, seeking a cure for a condition that can turn men into demons: the Catalyst.
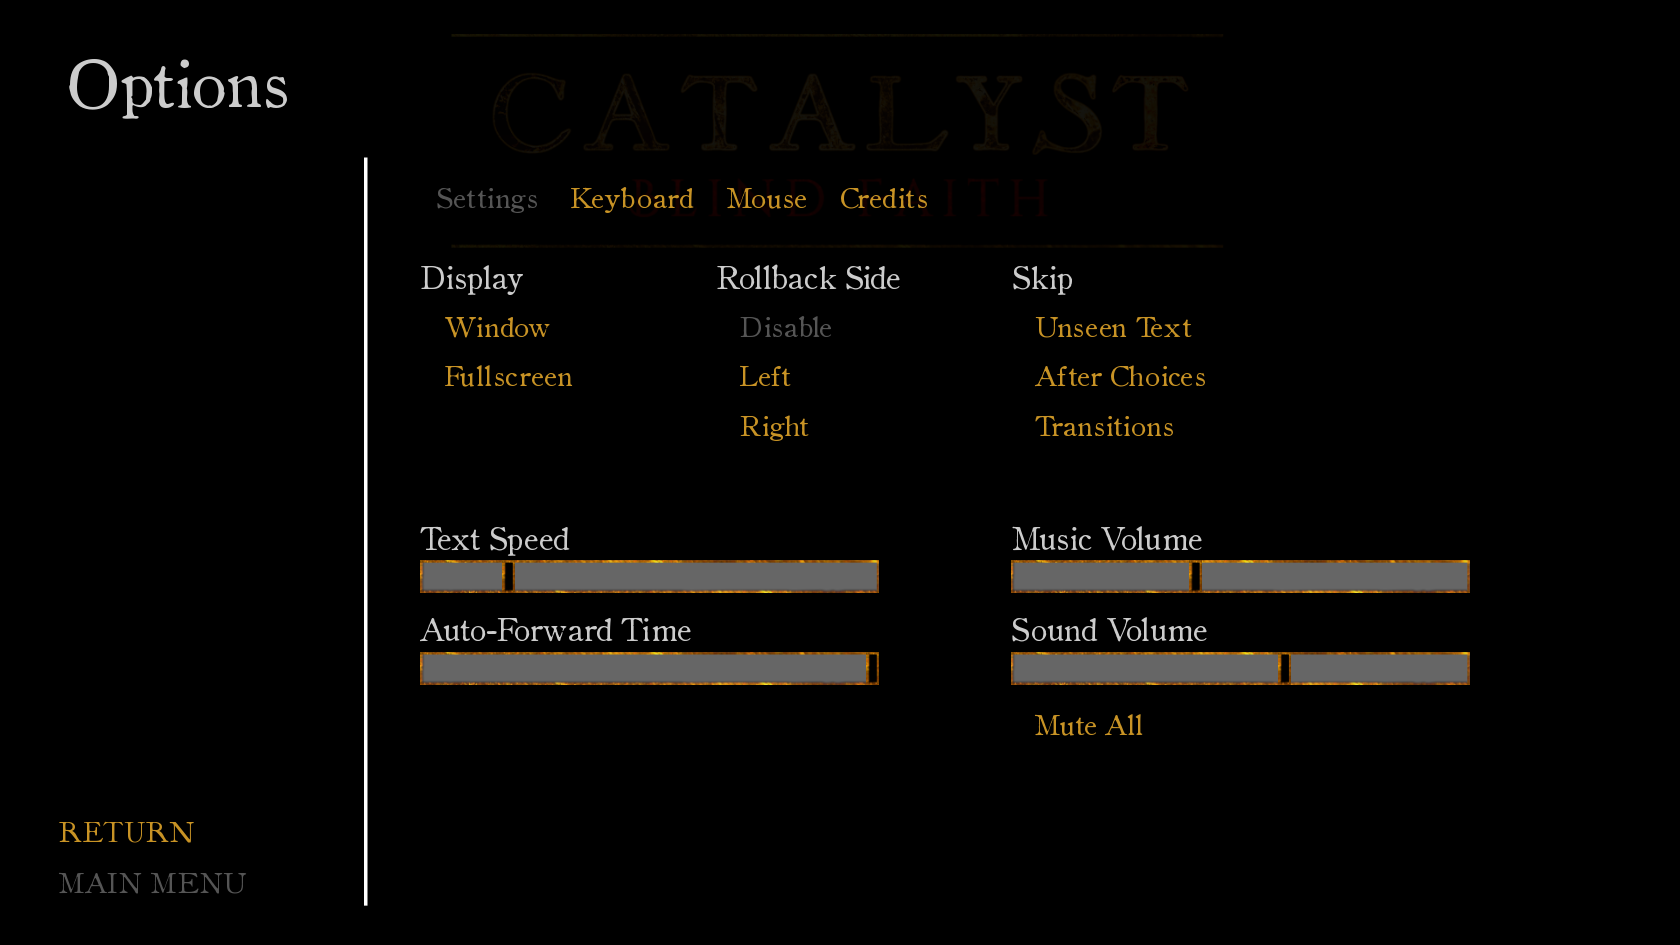
This is what the Preferences screen of Catalyst looked like originally. Just a slightly styled default code, I like the simplicity.

What we're focusing on are the two sliders on the left, labelled Text Speed and Auto-Forward Time. They're both contained inside a vbox, and we shall insert our text speed preview text between them.
This was the code for that particular part:
vbox:
label _("Text Speed")
bar value Preference("text speed")
label _("Auto-Forward Time")
bar value Preference("auto-forward time")As simple as the screen code gets, this is a vbox which contains four children:
- Text Speed label above the first slider
- bar, the first slider, controlling the text speed
- Auto-Forward Time label above the second slider
- bar, the second slider, controlling the auto-forward time
Now, let's add the text speed preview. I've modified the code - in my opinion, it is hilariously simple, being only 5 lines added and 1 changed. These lines are marked by five hashtags (#####) at the end.
default text_cps_preview = PreviewSlowText("Preview of the Text Speed.") #####
vbox:
label _("Text Speed")
bar value Preference("text speed"): #####
released Function(text_cps_preview.update_cps) #####
add text_cps_preview: #####
ysize 38 # Same size as the bar #####
yoffset 3 # Slight offset down #####
label _("Auto-Forward Time")
bar value Preference("auto-forward time")First, our PreviewSlowText CDD is prepared with the default statement. It is provided with the text that will be shown, "Preview of the Text Speed."
Next, the bar slider controlling text speed is given the released property. released property takes a screen action (talked about on LezCave in Screen Language #4+5), which in our case is the Function action, calling the CDD's update_cps method.
All of this basically means that anytime the slider is touched and released, the CDD will be told to reset, and it will re-show with the updated cps.
Finally, the preview Displayable itself is added into the vbox. It has just two simple properties:
- ysize to make it the same height as the bars, keeping consistent spacing.
- tiny yoffset, just because I thought it was still too close to the text speed slider.
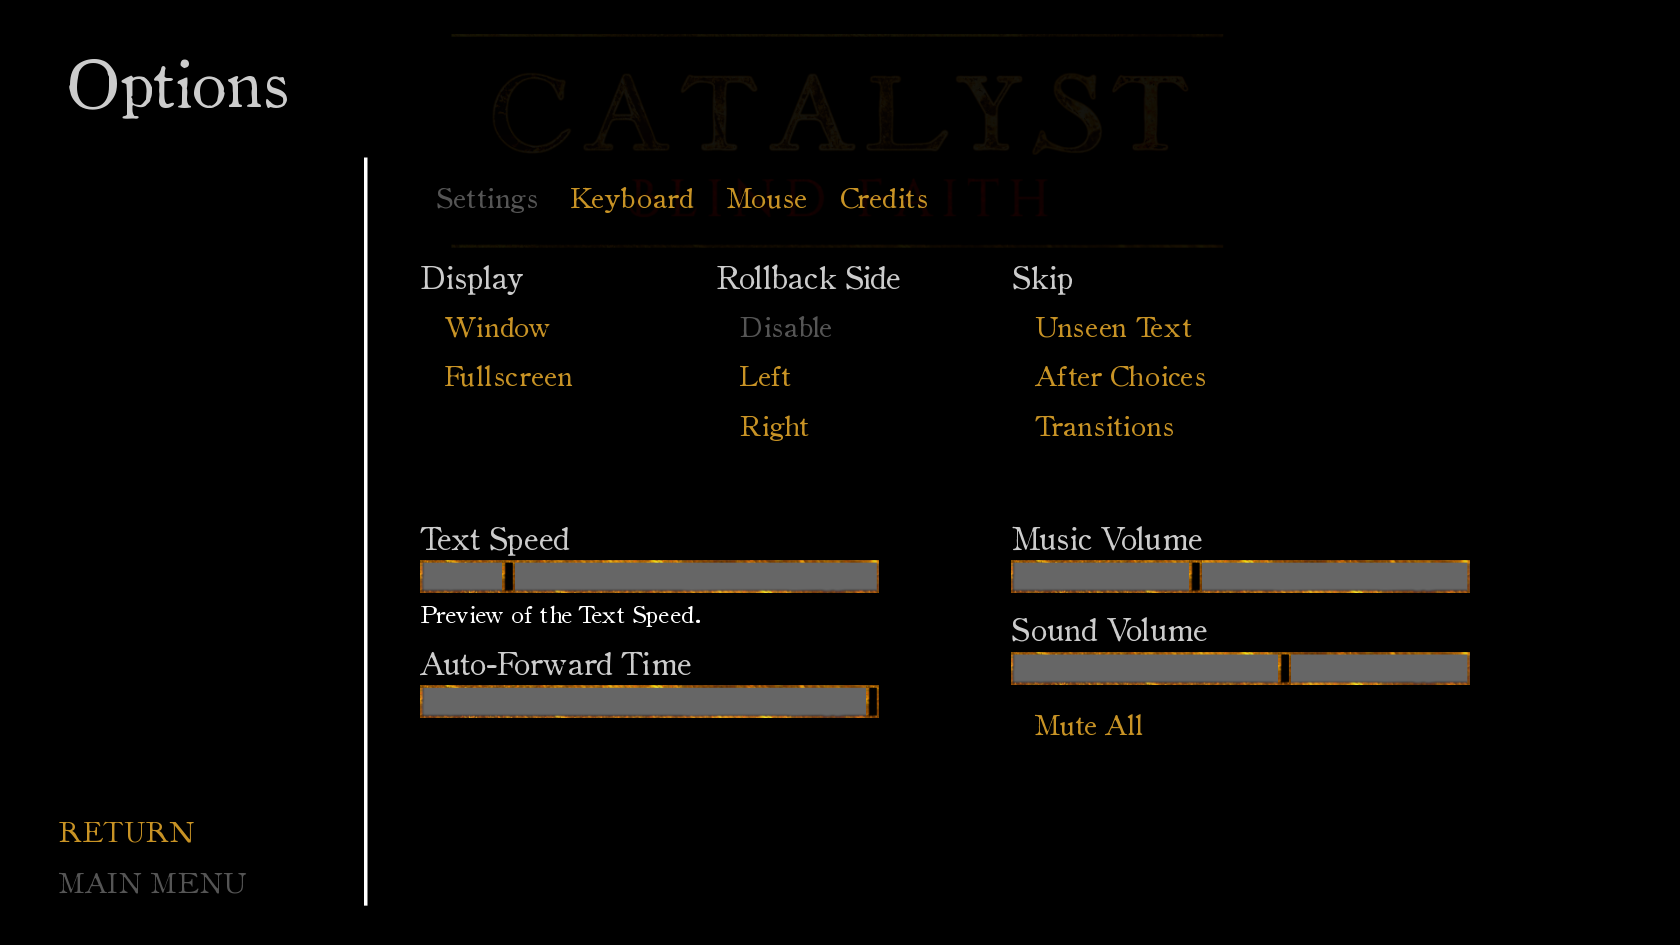
With the screen set up, the preview is now included in the screen, and it shall restart anytime the Text Speed is changed.
With Catalyst having styles already properly set up, the text gets styled automatically, and fits in seamlessly with the rest of the screen with no additional changes are required.

And that should be all the explanation done. Let's do some sort of a summary.
To use this in your own project, put the code of the PreviewSlowText class into your game folder (or any sub-folder), then modify your preferences screen as shown above.
Here's the file with the class prepared for you!
And of course, my usual bullet points. What have we gone over today?
- What are CDDs, or Creator Defined Displayables
- How the PreviewSlowText CDD functions
- How to define a CDD inside a screen and add it
Overall, there hasn't been a lot of code today, however it might've been the most complicated code we've encountered so far.
Good job if you made it all the way here, really. I hope the script serves you well, and I'll finish this page with some ingame images from Catalyst: Blind Faith. The game is still in development, so some of these images are placeholders, but I think it looks awesome nonetheless. Really, go check the game out!