
[wip] Git Tutorial #7
GitHub Collaborations: Forks and Pull Requests
GitHub can be incredibly scary. It's a shame - there are so many amazing projects, some of which may catch your eye. You may read through the code, get ideas for improvement, and genuinely want to contribute - but you don't know how, and you're scared of messing up a public project.
So, how do contributions like this work? That's what I'll teach you in this tutorial. It's not that hard, but a lot of it depends on branches. Be sure to study them back in Part #4 if you haven't already (which you probably should've by now).
First if you have a small project of your own and want to invite people to work on it without restrictions, it's a very simple process.
When you're on the repository's page, click the Settings tab. On the left side under Settings, you'll find the Collaborators tab. This is where you can add other GitHub users as collaborators, which gives them mostly unrestricted permissions, mainly being able to push without pull requests, a feature we'll talk about later.
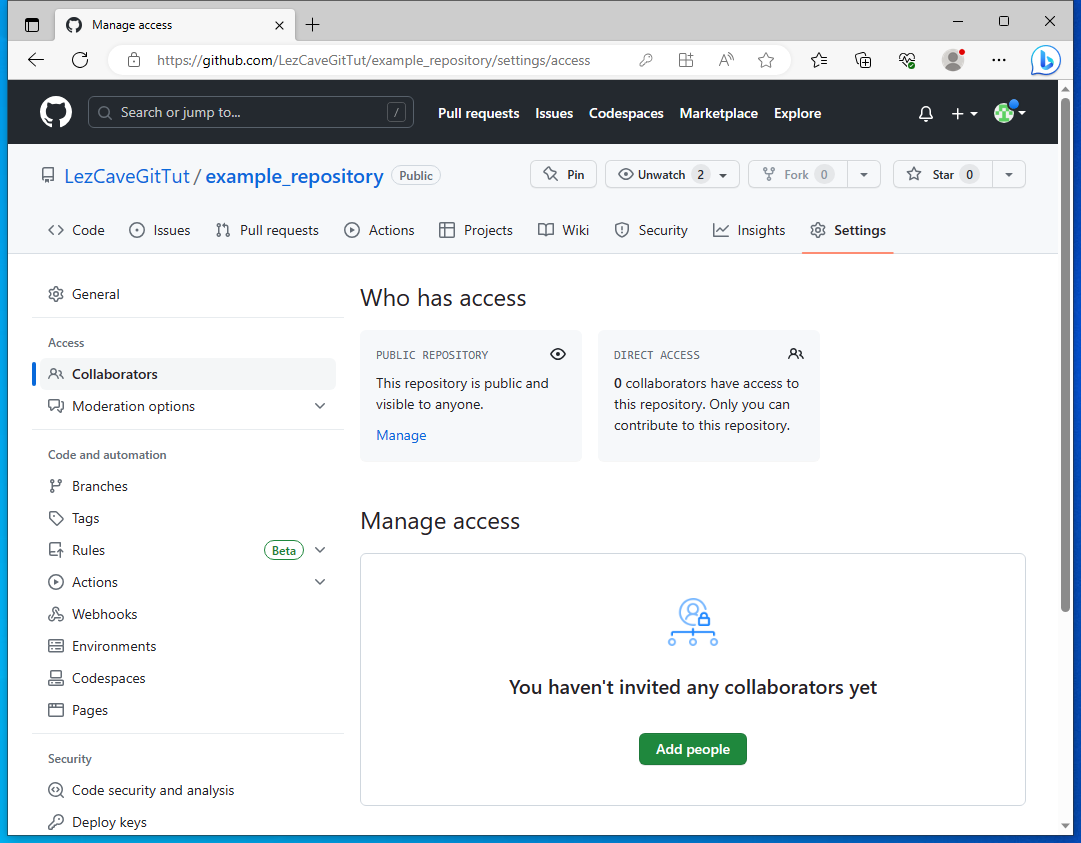
This works the same for both public and private repositories. Only difference is that private repositories cannot be viewed by default, which naturally gets overwritten for invited collaborators.
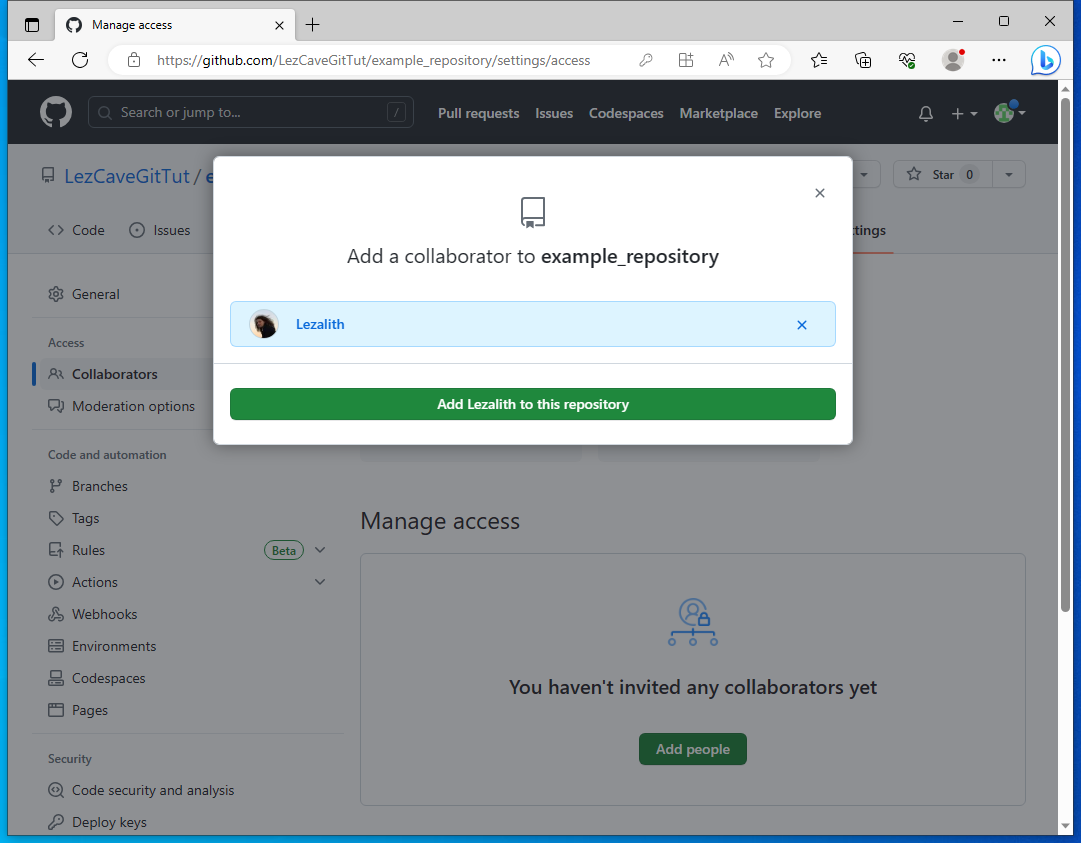
I'll go ahead and invite my main account to work on our example_repository.
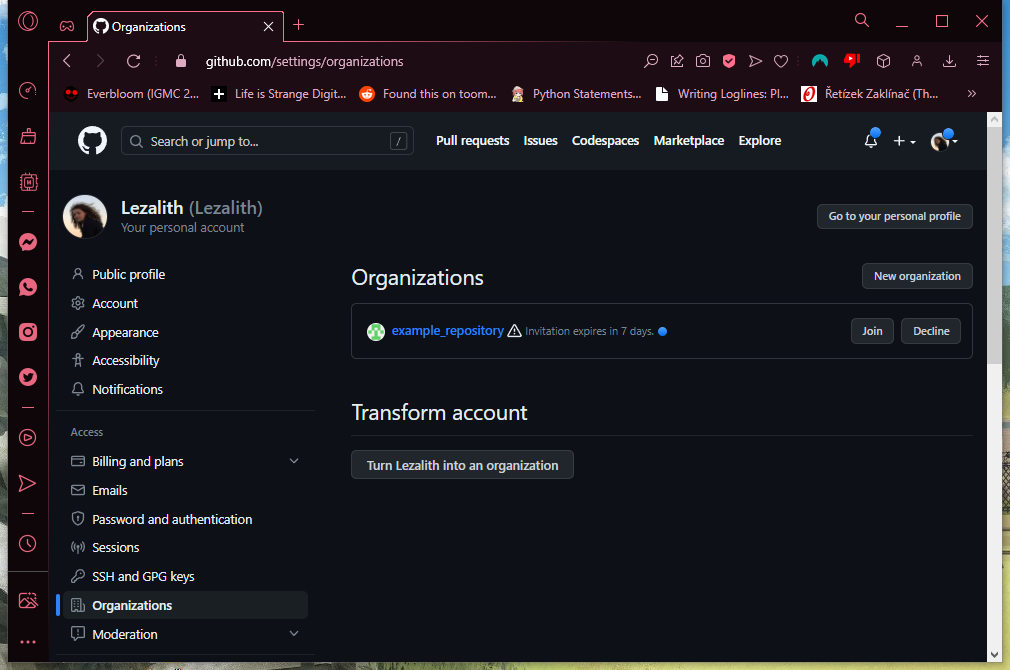
On my main account, the invite lies under your Profile Picture in top right, Your profile, on the Organizations tab under Access category.
Same thing goes for Git. Before getting GitHub Desktop for this series of tutorials, I've always been using Sublime Merge - I use Sublime Text 3 as my editor, and the two go hand in hand. Thus, Sublime Merge is the work of Lezalith, and GHD of the owner, LezCave Git Tuts.
What might catch your eye the most is the commit history. It's very visual, and can look awesome with multiple branches. For now though, we have just our main. I've cloned the repository, meaning main is up to date with its origin remote counterpart, and I've prepared a new commit to change that.
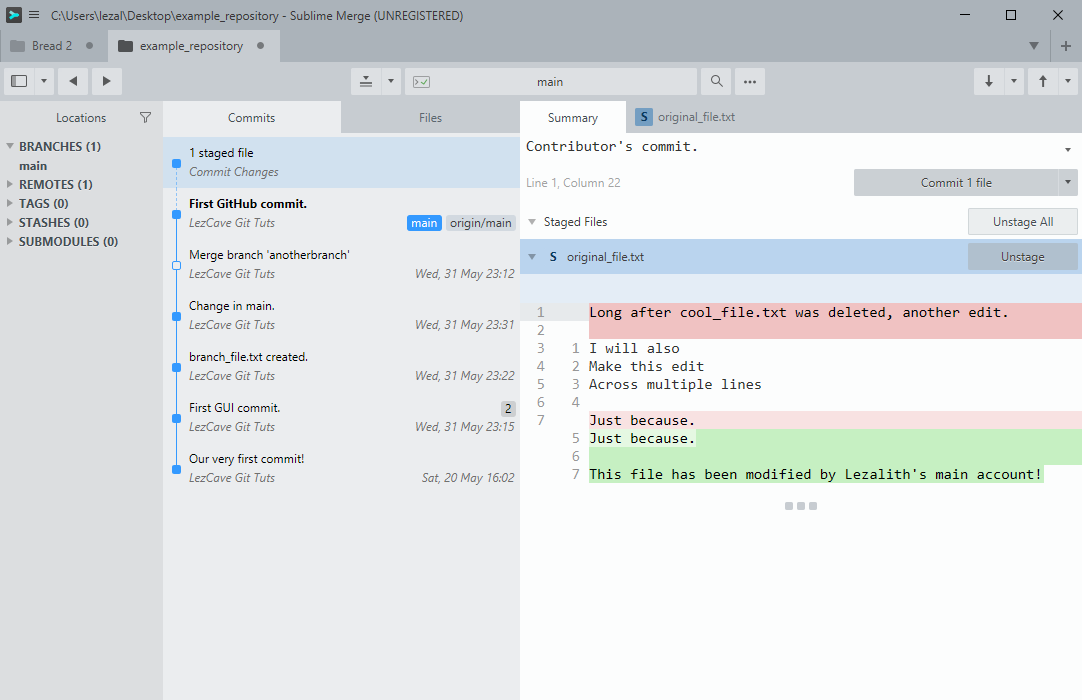
The commit is named "Contributor's commit.". In it, I've edited original_file.txt, as I usually do - deleted the first line, added a couple more.
As Lezalith has Contributor permissions, it will have no trouble pushing the commit onto GitHub, after which we can pull it on the owner's side.
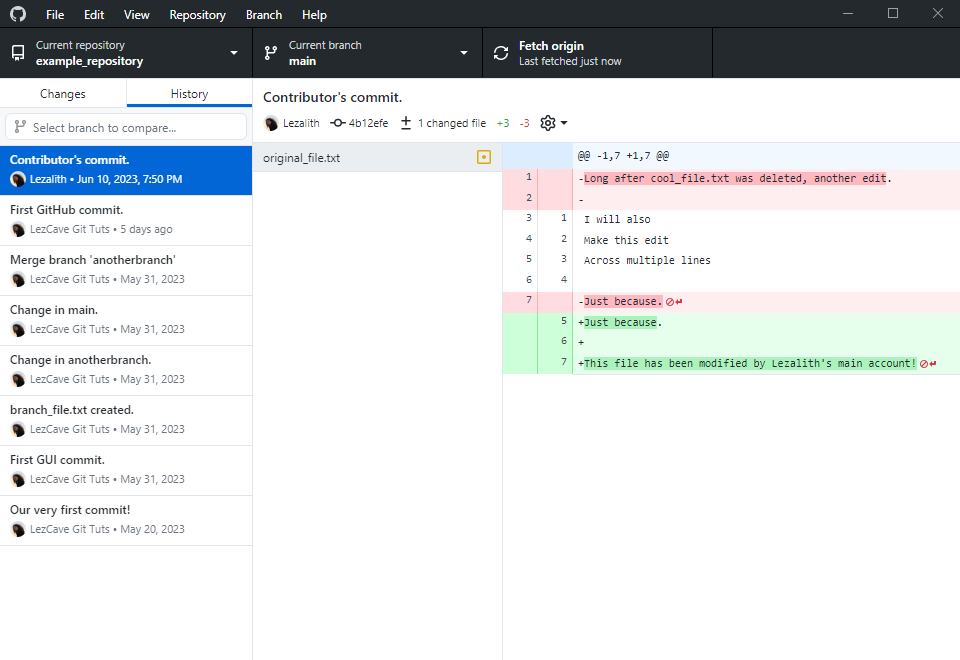
As you can see, the commit is in our History, and it differs in commit's author: The latest commit is from Lezalith, while all previous ones are from LezCave Git Tuts.
Now that I think about it... Why does LCGT have the profile picture? I don't remember setting it...
Huh. Anyway, let's move on.
From now on, we'll be talking about contributions to public repositories - those where the additions are controlled and you cannot simply push your commits in.
I've removed Lezalith from the list of Contributors. As the repository is public, I can still view it or pull it, but I do not have the permissions for a push:
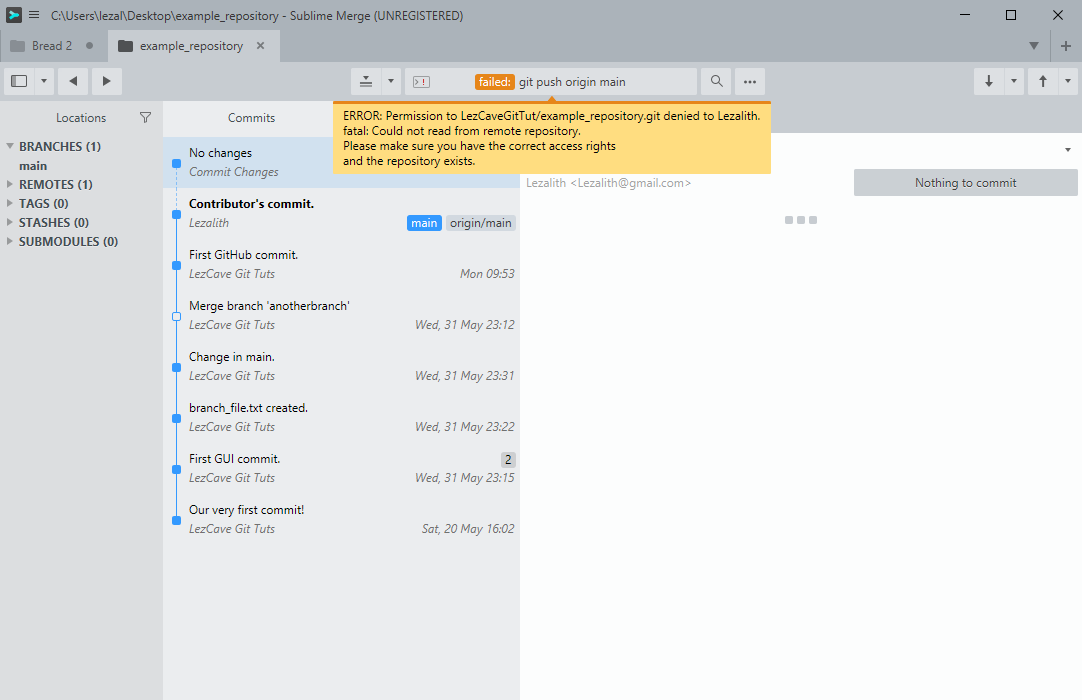
Enter forks. Forks are a work of GitHub, a way for you to create your own personal copy of a repository. In this copy of yours, you can experiment and prepare your changes, and then offer said changes to the original project through a pull request.
But that will come later. Let's start by creating a fork, through the dropdown Fork menu on the repository's page and clicking Create a new fork. I've switched to Opera again, and we'll be working with my Lezalith account almost till the end of this tutorial.

GitHub will ask whether you'd like to give the repository a different name (has no effect on interactions with the original), and whether you'd like to copy all the branches. main is usually sufficient, because other branches in public projects are usually feature tests and releases.

After a slight load time, the forked repository is created and we're brought to its page. You can notice the "forked from LezCaveGitTut/example_repository" line under the repository's name.
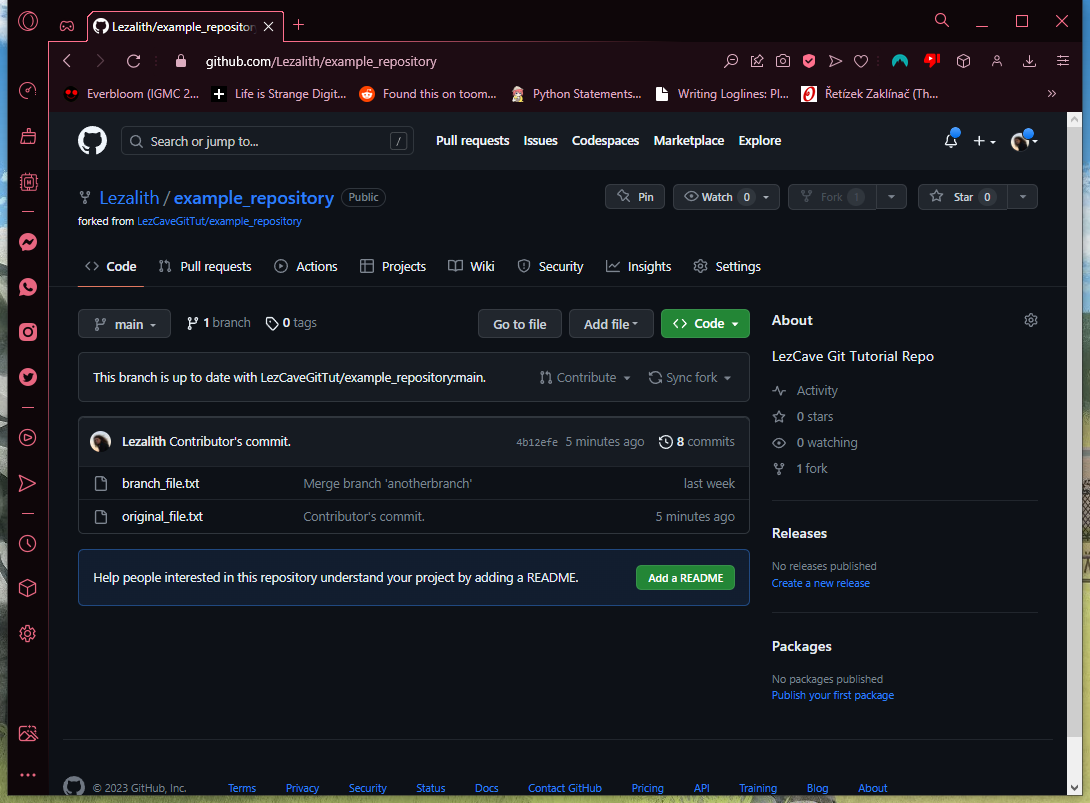
I will now go ahead and clone this forked repo onto my main machine, so that we can work on changes to add to the original.
Sublime Merge is different from GHD, but I'm confident that not enough for you to not understand what's happening.

After the repository is done cloning, we continue by creating a new branch (here by right-clicking the BRANCHES tab on the left), which I've named lezs_contribution.
Then, I've created a new file called contributed_file.txt (containing one line of text), and committed it as "Public contribution commit." into this lezs_contribution branch.
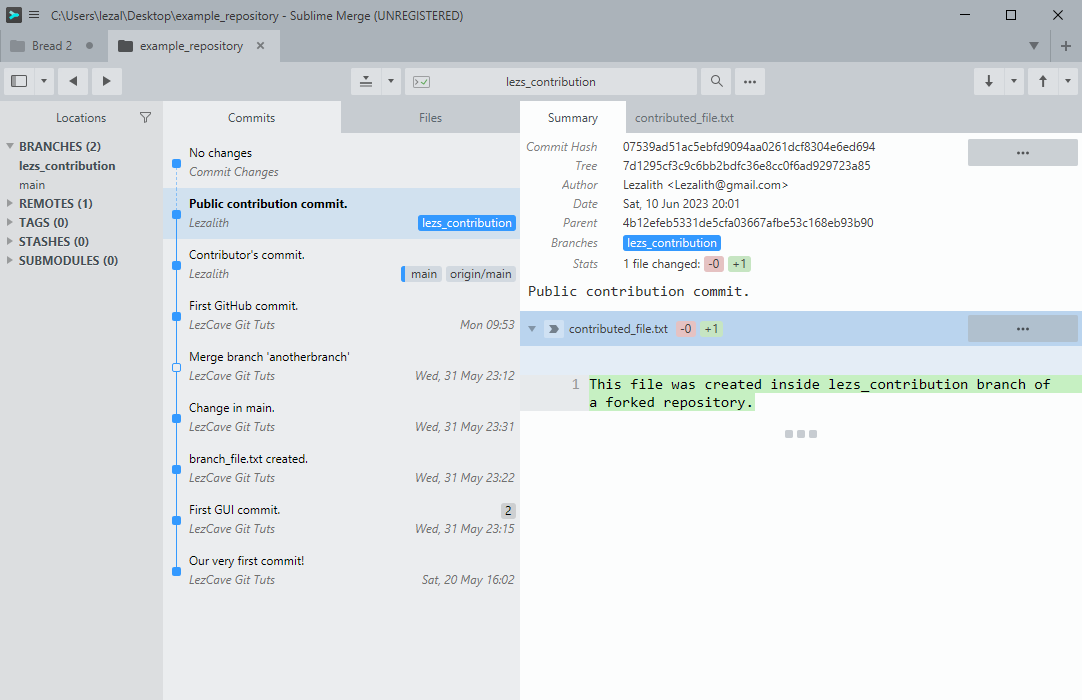
With the branch being ahead by one commit, let's now push it onto GitHub. Pushing it will also create lezs_contribution branch's counterpart on the remote.
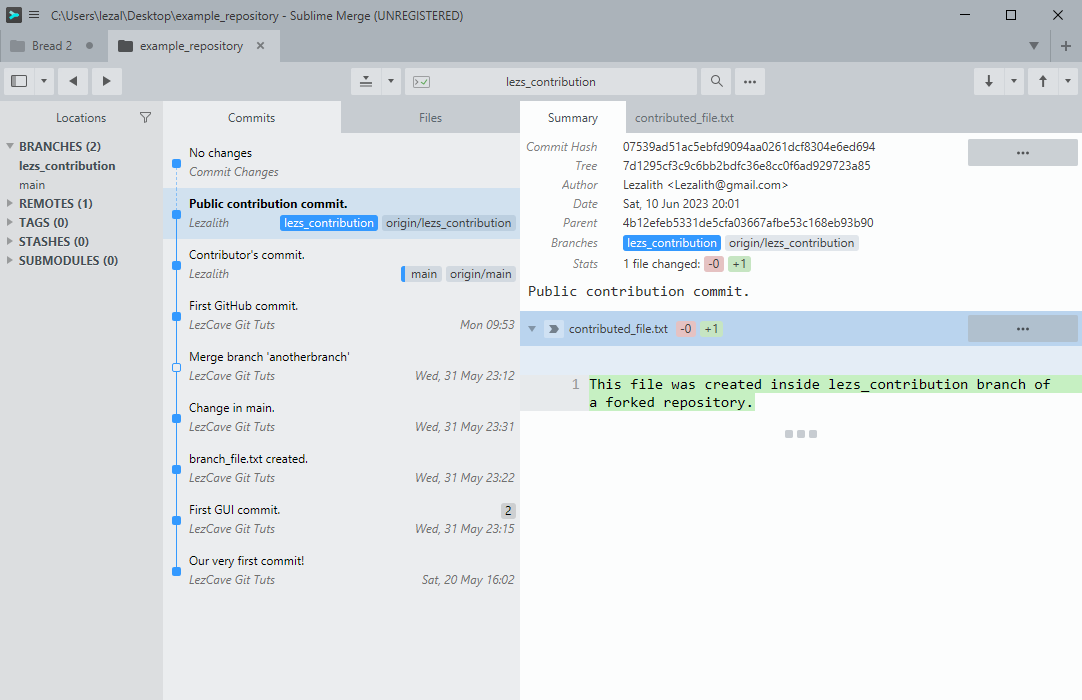
Pushed onto GitHub. Now, let's go back into the browser, let's now open a pull request on the repo's page.
Pull requests are a great feature that makes collaborations a breeze. They are an offer for repository's owner to pull changes created by other users into their repository - they get to review the changes committed, and can then decide whether they want to accept the contribution or reject it.
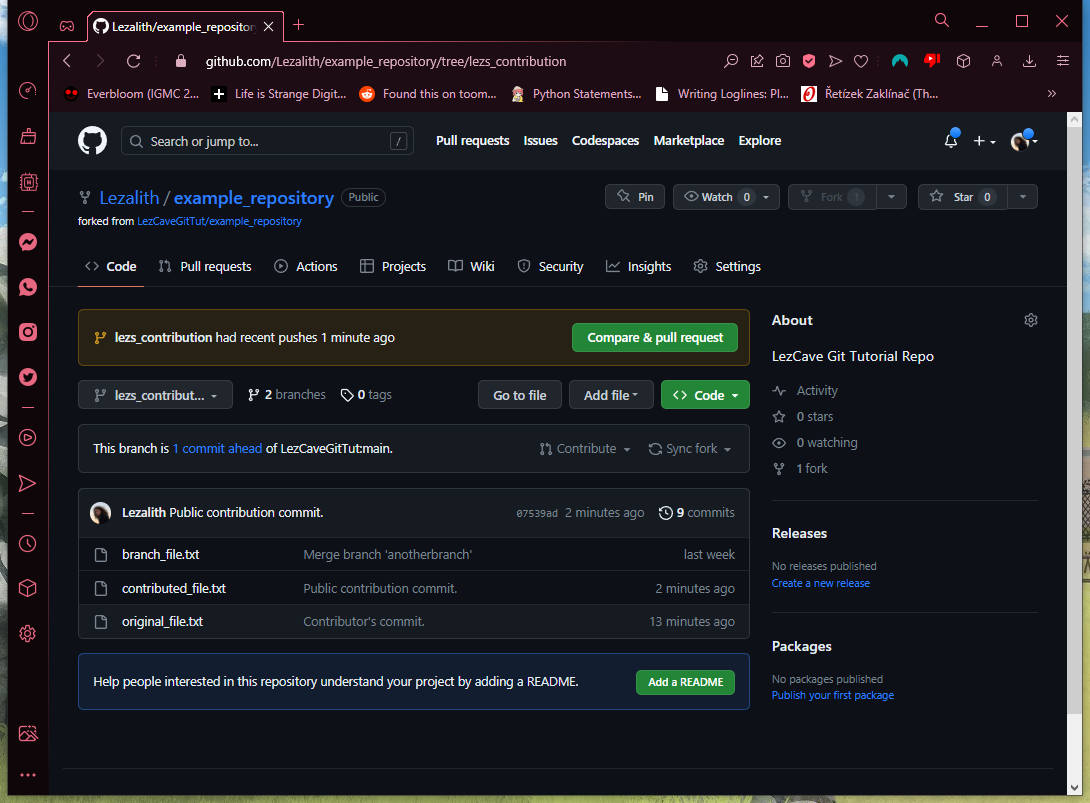
If we switch to the lezs_contribution branch (here as lezs_contribut...), we will find the new contribute_file.txt. GitHub is already offering us the option to create a pull request, so let's do that now - click the Compare & pull request button.
When we enter the Comparing changes page, we get to decide where we want our changes to go to. By default, this points to the main branch of our current repository - the forked repository.
It is not what we want right now - we want it point to the original repository.
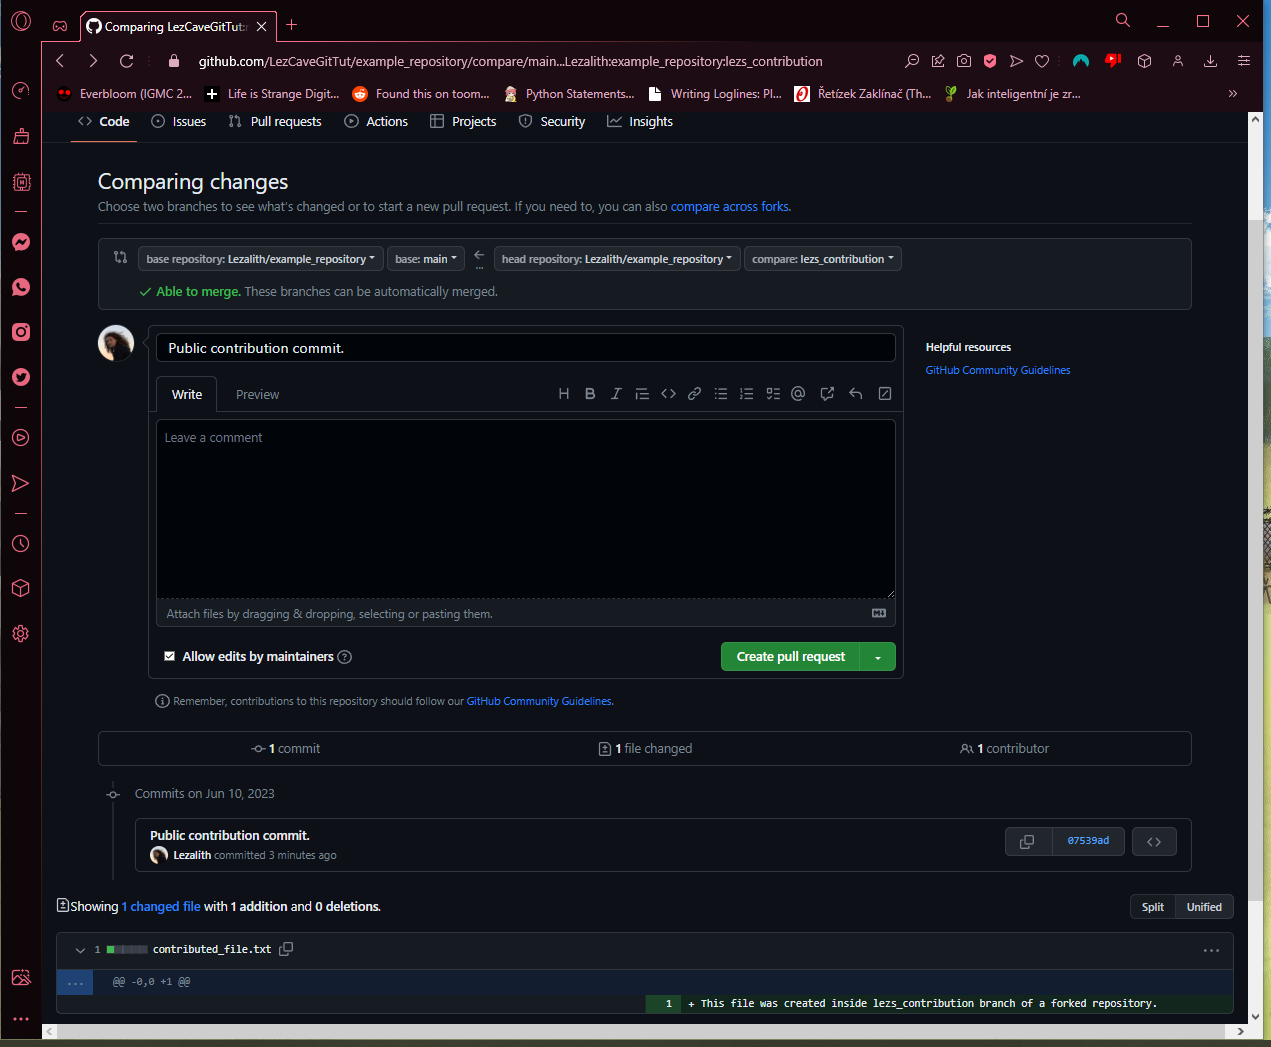
Clicking the dropdown menu of base repository, we can choose the example_repository on LezCaveGitTut account. It points to the only branch there is, the main branch. On the other side, the head repository, we're contributing from Lezalith's version of example_repository, from the lezs_contribution branch.
Everything checks out. After writing the title and a comment with the pull request's description, I can go ahead and click Create pull request.
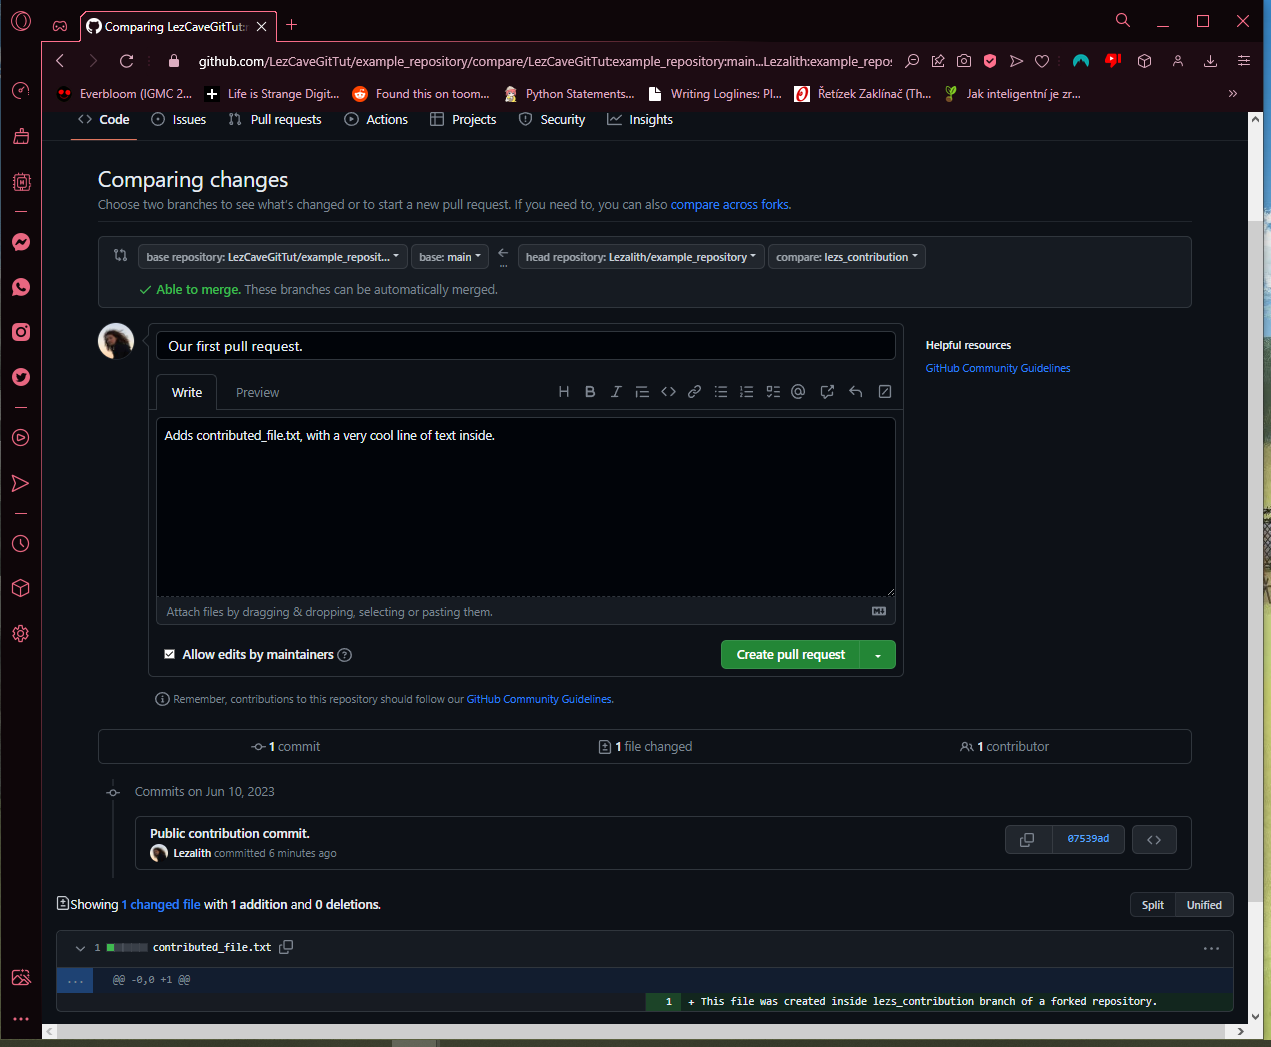
And that's the pull request open.
Here's how it look inside a browser from the contributor's side: It shows the comment (which can continue into a discussion below), the commits included (just one in our case, "Public contribution commit."), and a check whether the changes conflict with the destination branch.

If there were conflicts, the pull request can still be accepted, however all merge conflicts (discussed in Part #4) have to resolved first. This has to be done by the repository's owner, so try to avoid it when possible to make their life easier.
To avoid it, communicate with other contributors to make sure more of you aren't working on the same files at the same time.
On the other side - the owner's side - we can see a (1) written on the Pull requests tab. This is where a list of all pull requests can be found.
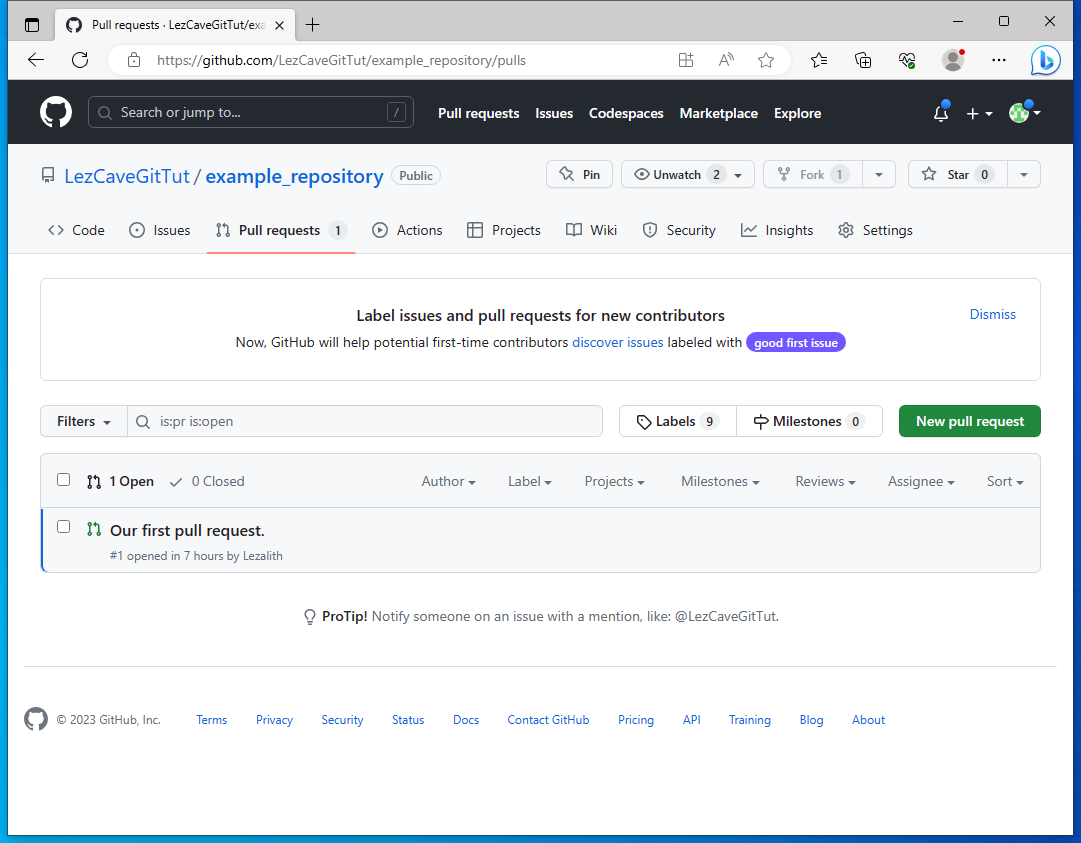
And here's how the page of a pull request looks like from the owner's side.
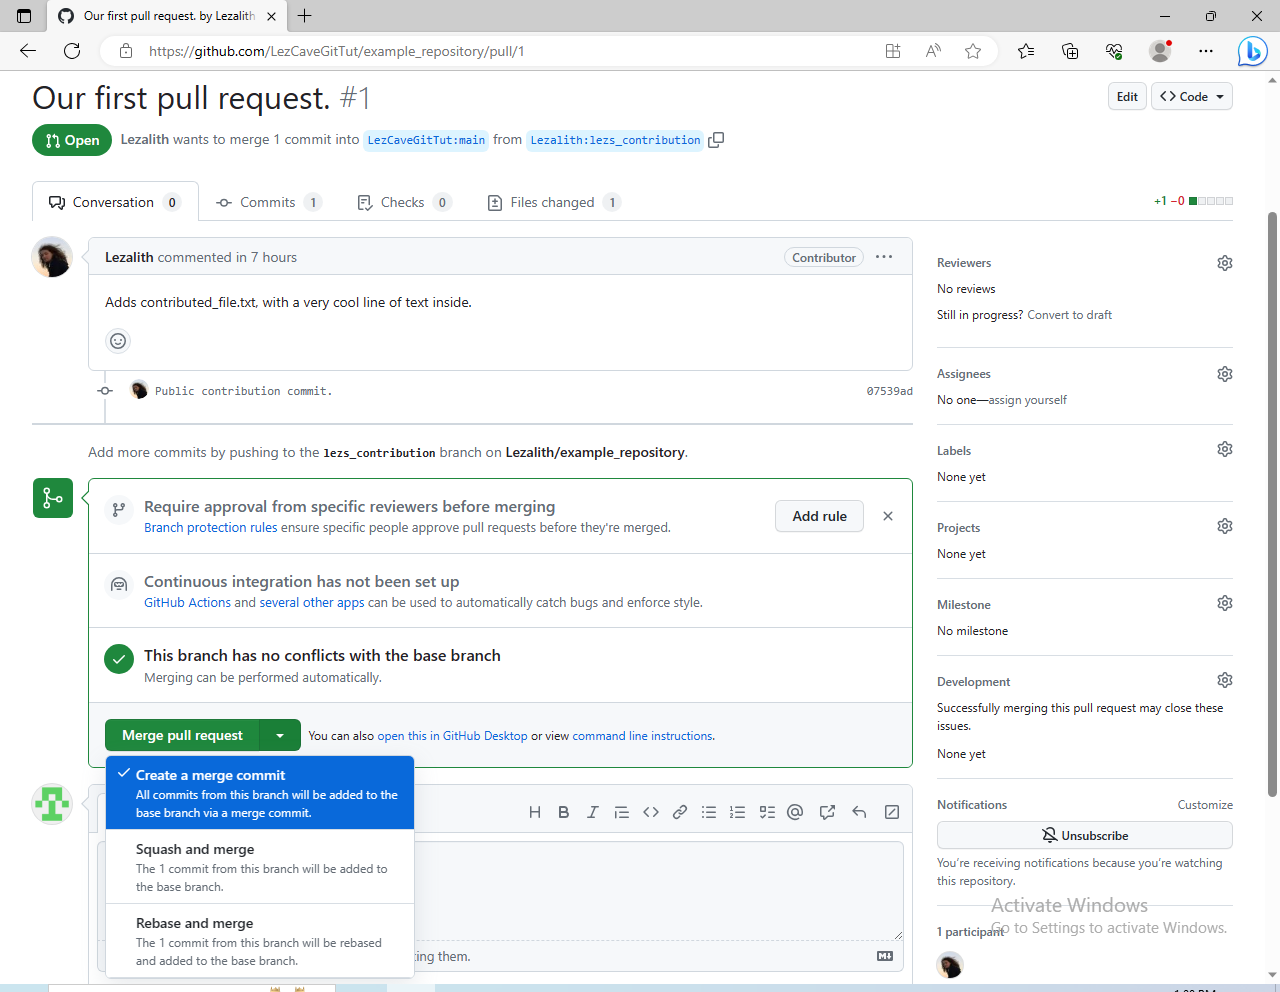
We are presented with plenty of technical information. All changes can be reviewed through the Commits, Checks and Files changed tabs, and there's a green button to Merge the pull request at the bottom, which presents us with three options:
- Creating a merge commit will keep the record of the merged branch's existence, and executes the merge by creating a commit that mentions it
- Squash and merge will add all commits into the branch, without creating a merge commit to log that a merge has happened
- Rebase and merge is something I've given up trying to understand
You can't go wrong with the first option. Click!
This is the point where we'd have to solve merge conflicts if there were any. There are not, meaning nothing's stopping GitHub from finishing the merge.
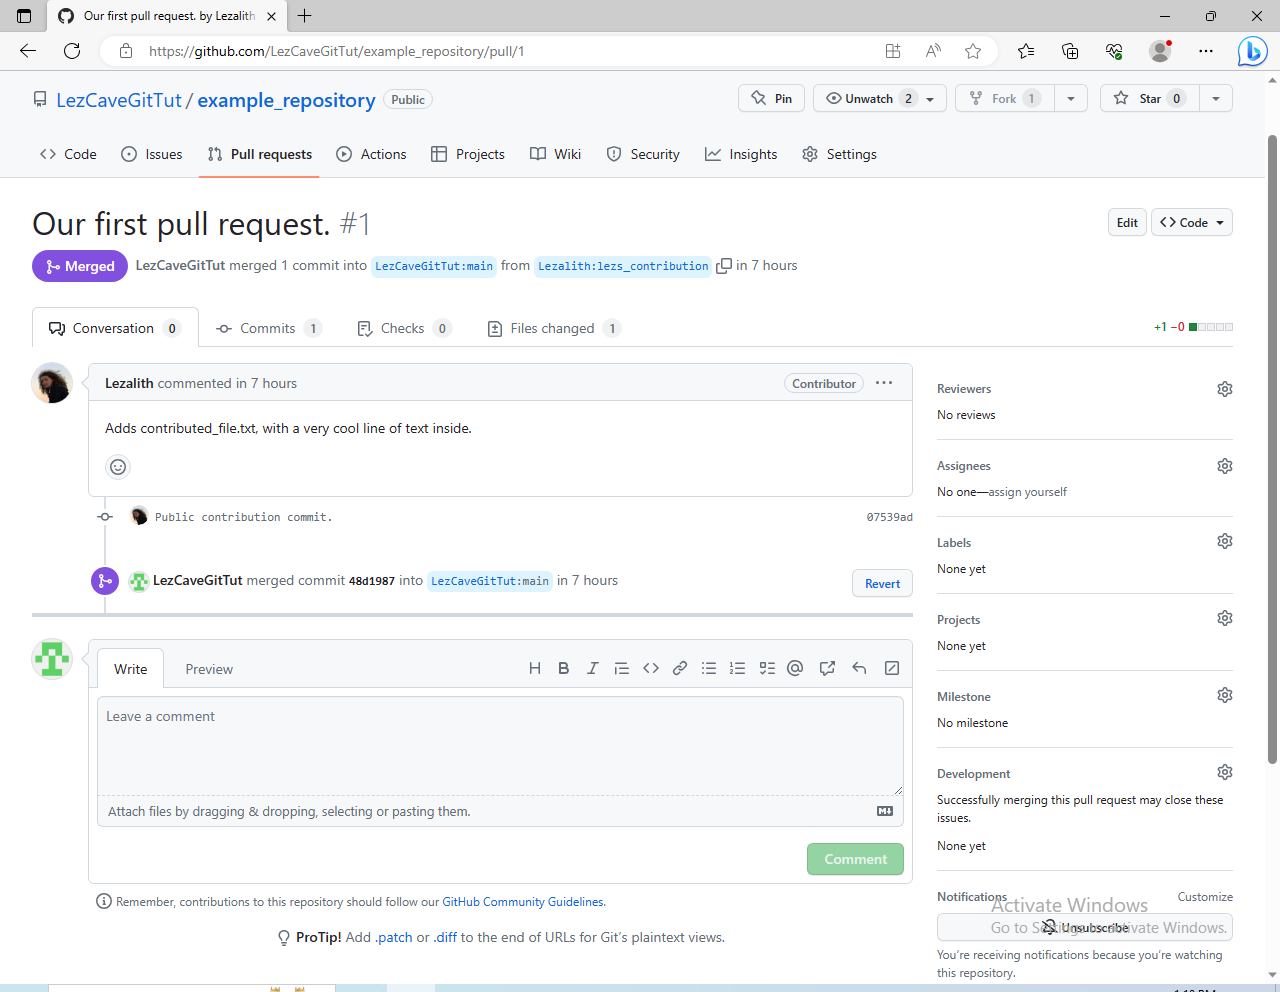
Merge is completed, and the pull request is closed automatically. "Public contribution commit." is now part of the main branch of the original example_repository!
If we go ahead and load up our GitHub Desktop now, we can pull these newest changes.
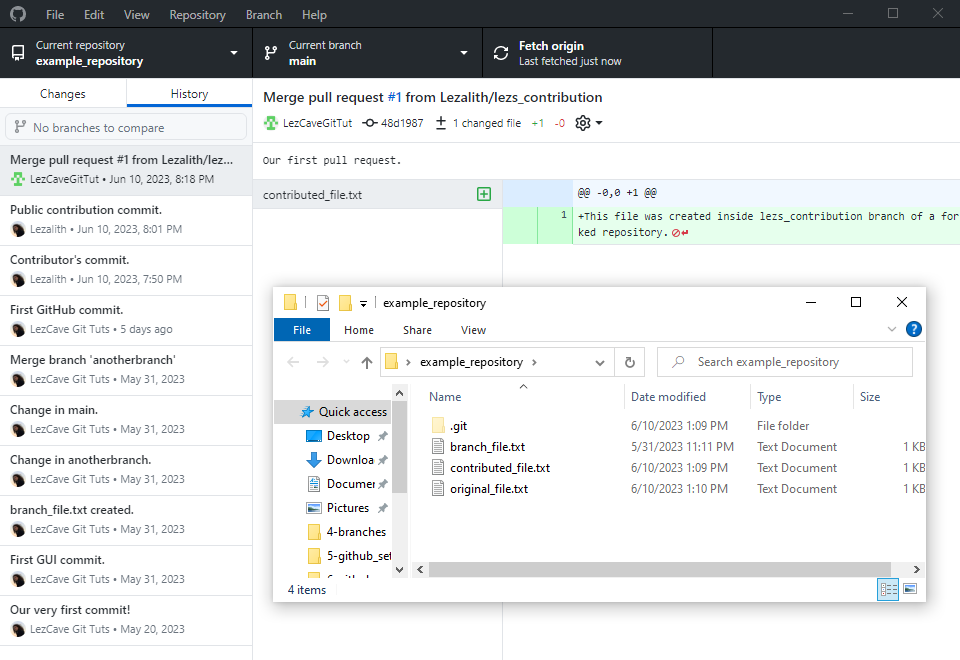
Let's review the history one last time. The last tutorial ended at "First GitHub commit.". This tutorial, we've first created "Contributor's commit." and pushed it with Collaborator permissions, before removing the permissions and creating a "Public contribution commit." inside a created forked repository.
The latest commit is once again the work of LezCaveGitTut (commits on GitHub's website use account's name for authors), where we merged our very first pull request. Without it, "Public contribution commit." would be nowhere to be found.
Is it just me, or is this the longest Git tutorial of them all? Let's see it the summary is accordingly long. Today, I have hopefully taught you how to:
- Add Collaborators to your GitHub repository
- Fork a repository
- Create a branch under a forked repository
- Create a pull request for someone's repository
- Accept someone's pull request to your own repository
And that's it. We've reached the end of the Git Tutorials series.
It's a relief, honestly. I've spent about three weeks writing this series, and there hasn't been almost any programming involved. I'm looking forward to returning to my Ren'Py projects - some of which I'll hopefully share with you here, in my LezCave!
Originally, there were supposed to be five tutorials. The total count is nine. If you've read them all and gotten all the way here, I am amazed, and honored.
Thank you so much for reading my tutorials, and have a beautiful day.